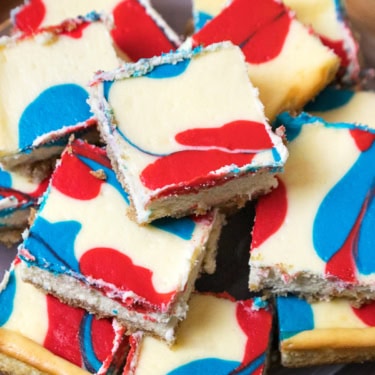
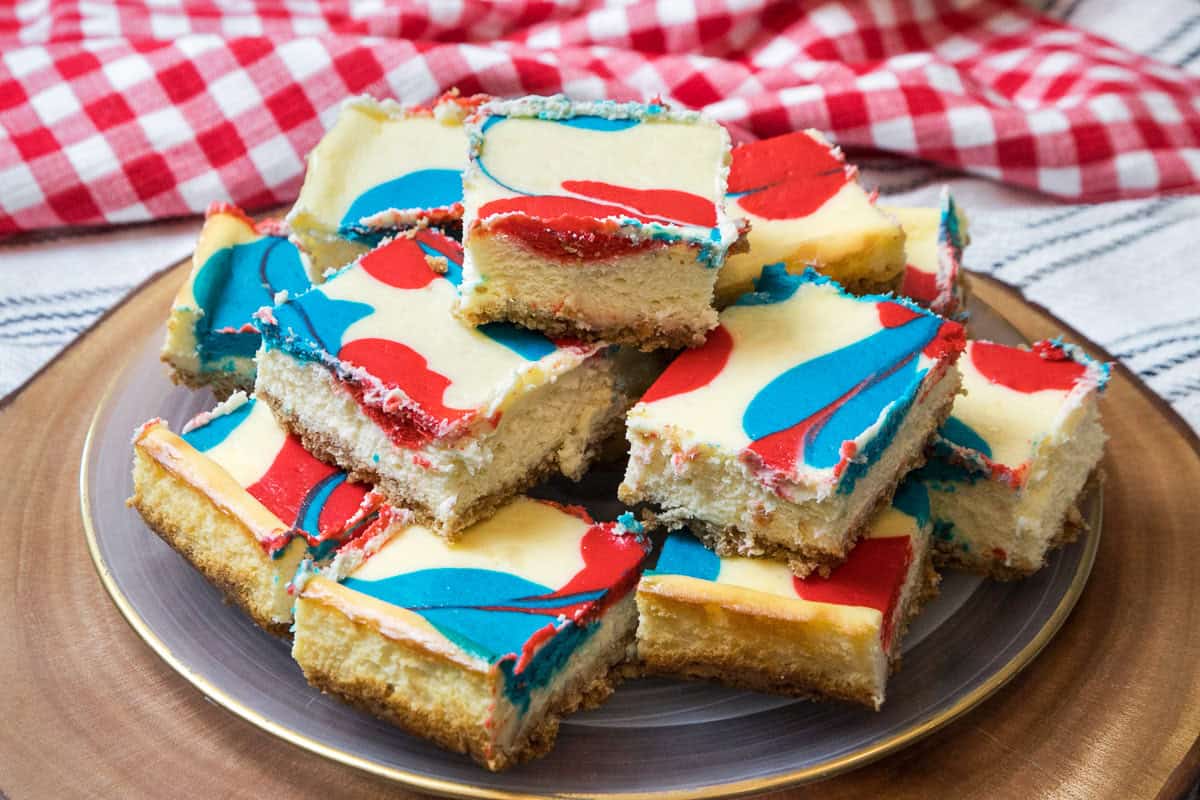
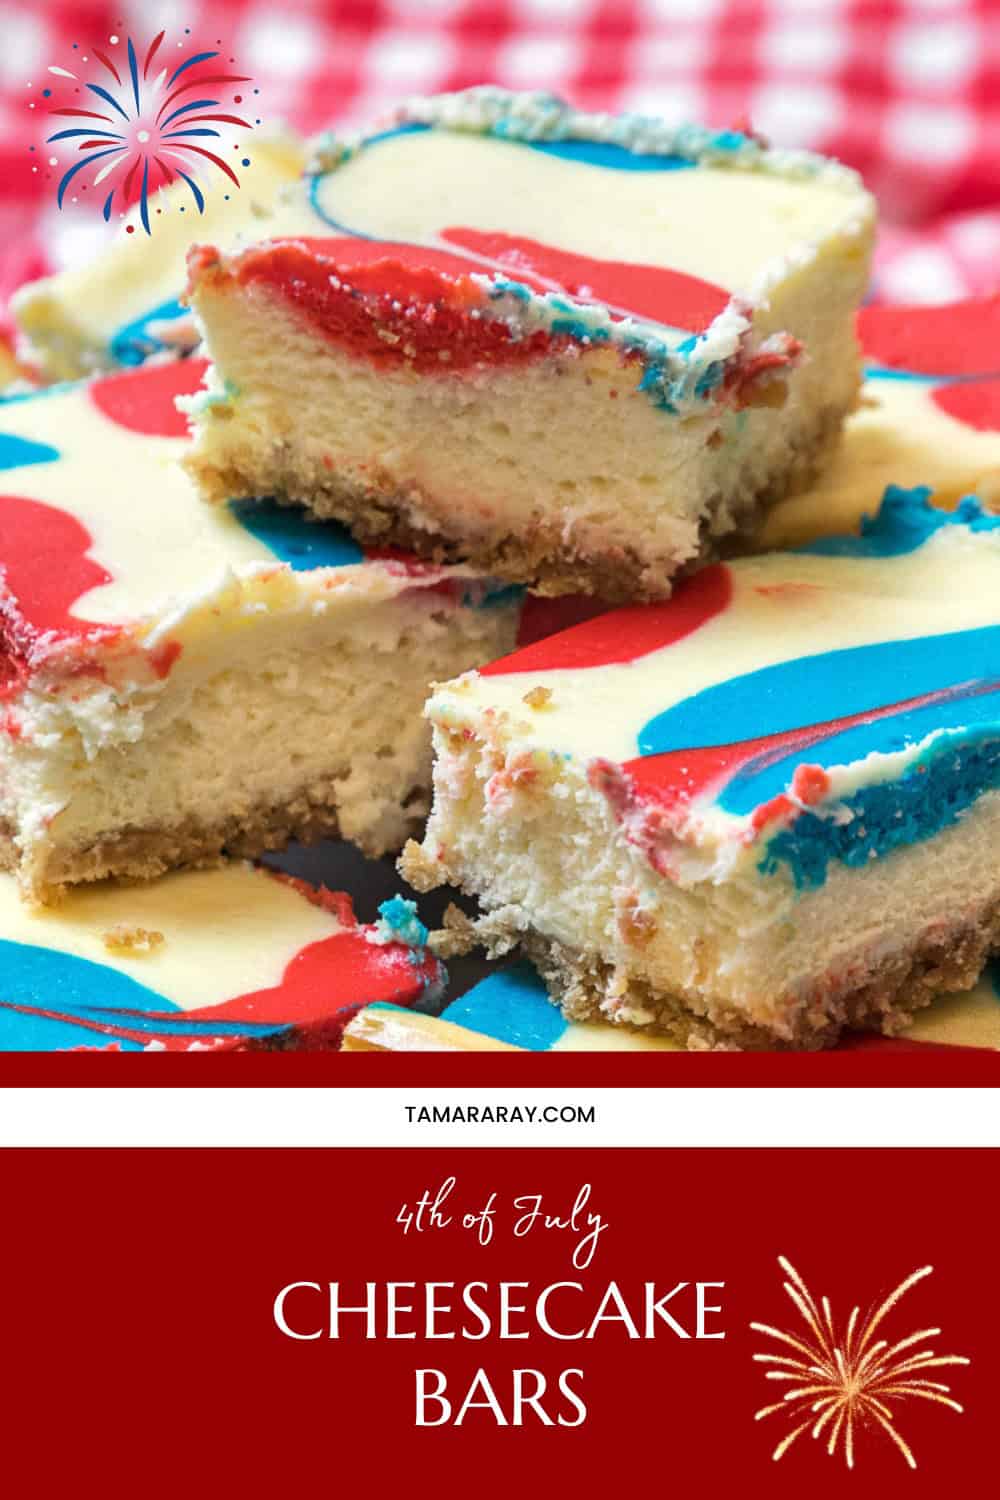
We have a 4th of July cheesecake bars recipe for you that tastes amazing! This festive dessert satisfies everyone’s sweet tooth with a cream cheese filling that is so good! The patriotic cheesecake design in the cream cheese celebrates the colors of Independence Day – red, white, & blue! These colorful cheesecake bars are a dream come true to cheesecake lovers!
Make your next 4th of July a patriotic celebration with these easy-to-make red, white, and blue cheesecake bars. Another fun dessert is our red, white, and blue rice Krispie treats that are so easy to make for the kids on the 4th.
🥄 Key Ingredients
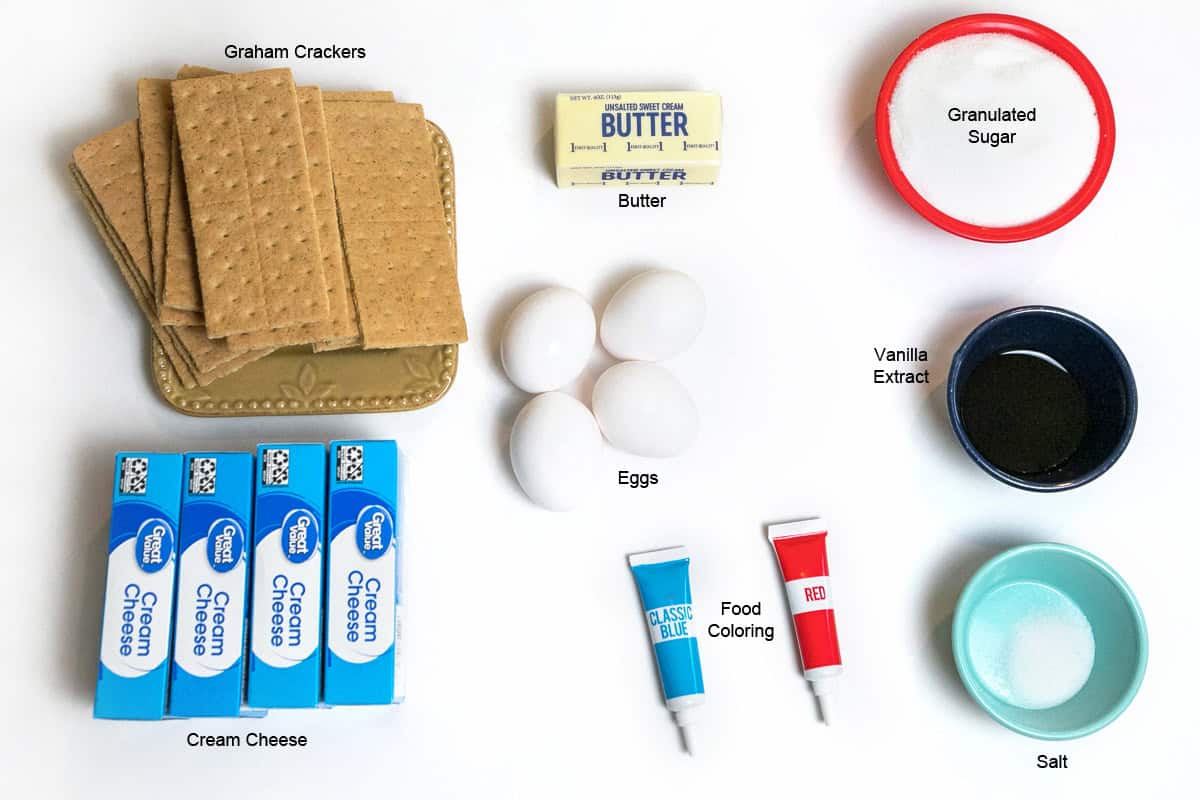
- Four 8 ounce packages of cream cheese – softened
- 2 cups graham cracker crumbs (about 1 and 1/2 sleeves)
- 1 and 1/4 cup sugar (1/4 cup for the crust and 1 cup for the cheesecake)
- 4 large eggs
- 1 stick of unsalted butter – melted
- 2 teaspoons vanilla extract
- 1 teaspoon salt
- Red and blue food coloring
👩🍳 How to Make 4th of July Cheesecake Bars
These step-by-step instructions are accompanied by detailed photos for enhanced clarity and guidance.
Step 1. Preheat the Oven
To begin with, set your oven to 325 degrees Fahrenheit.
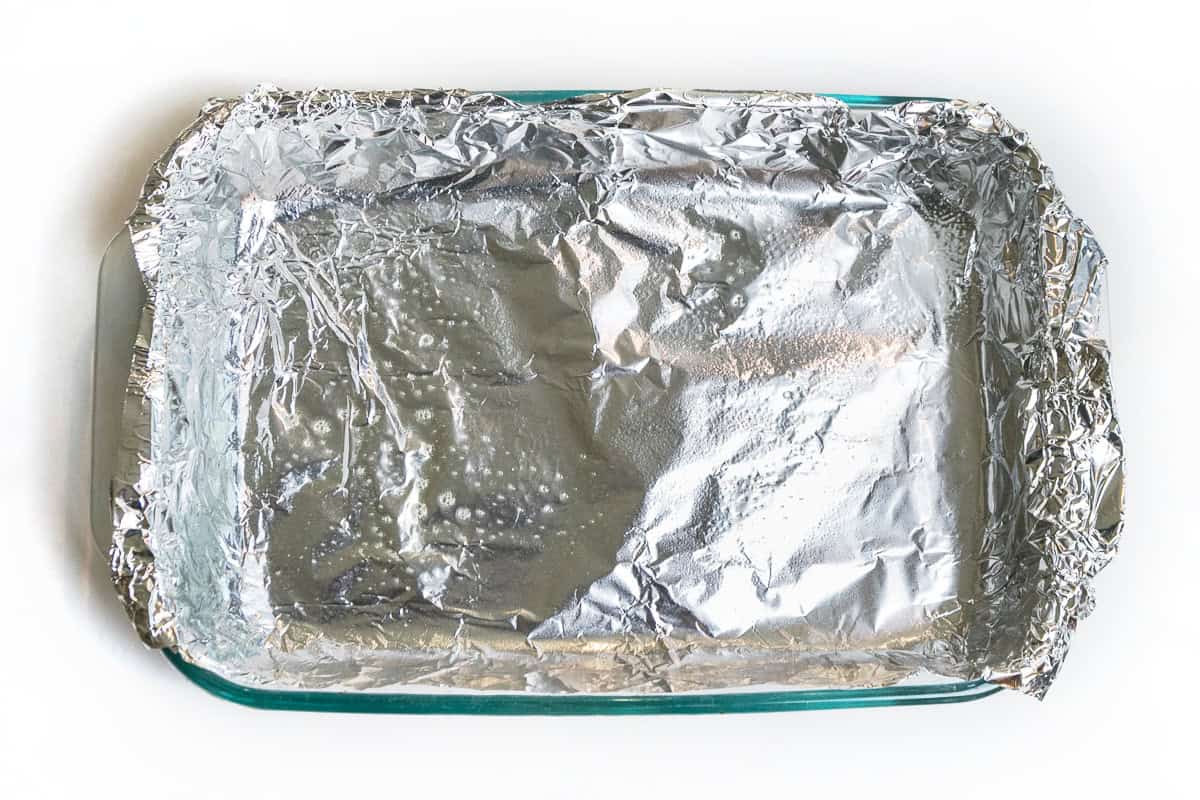
Step 2. Line a Baking Dish
Then, line a 9×13-inch baking dish with aluminum foil. After that, spray the aluminum foil with non-stick cooking spray and set it aside for now.
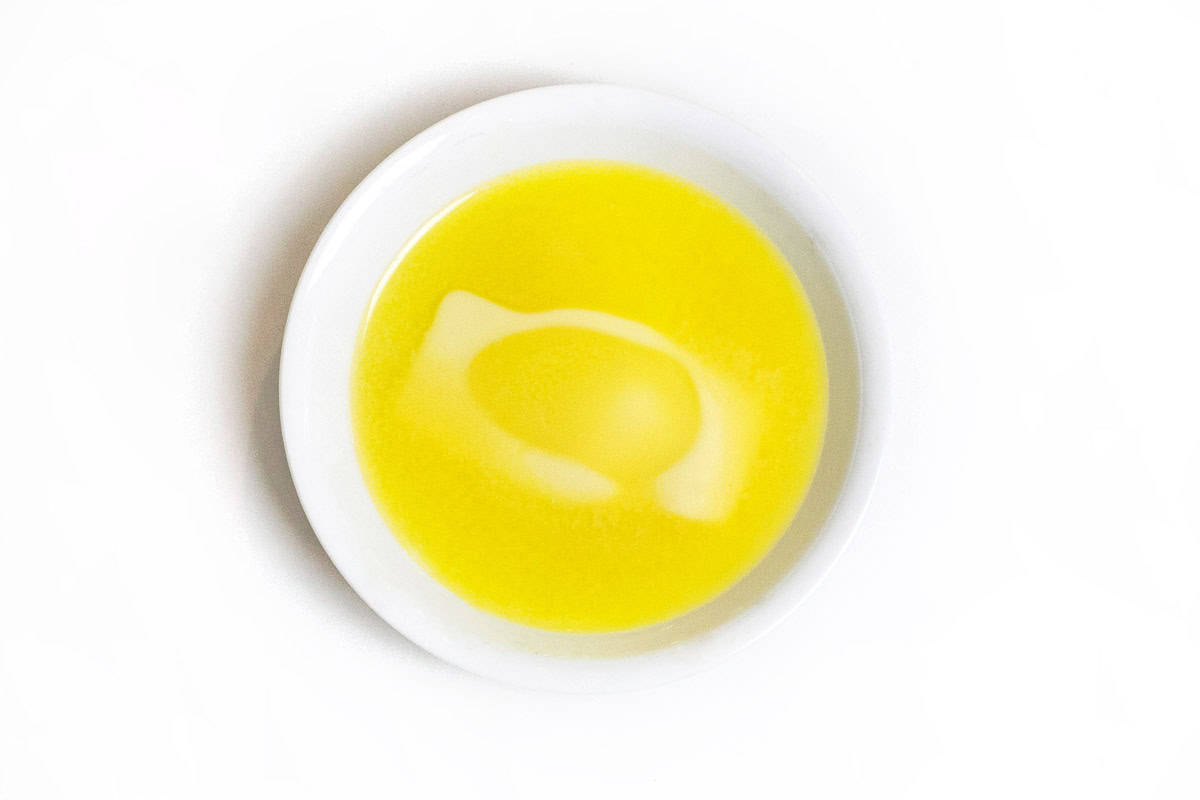
Step 3. Soften the Butter
Put one stick of unsalted butter in a small bowl, one that is safe for the microwave. Place the bowl in the microwave and heat the butter until melted, about 20 seconds or so. If you prefer, you can take the butter out of the refrigerator and let it sit on the countertop at room temperature until it becomes soft. Set the butter aside for now.
Note: At this time, take the cream cheese out of the refrigerator and let it sit on the countertop to soften until we are ready to prepare it a little bit later.
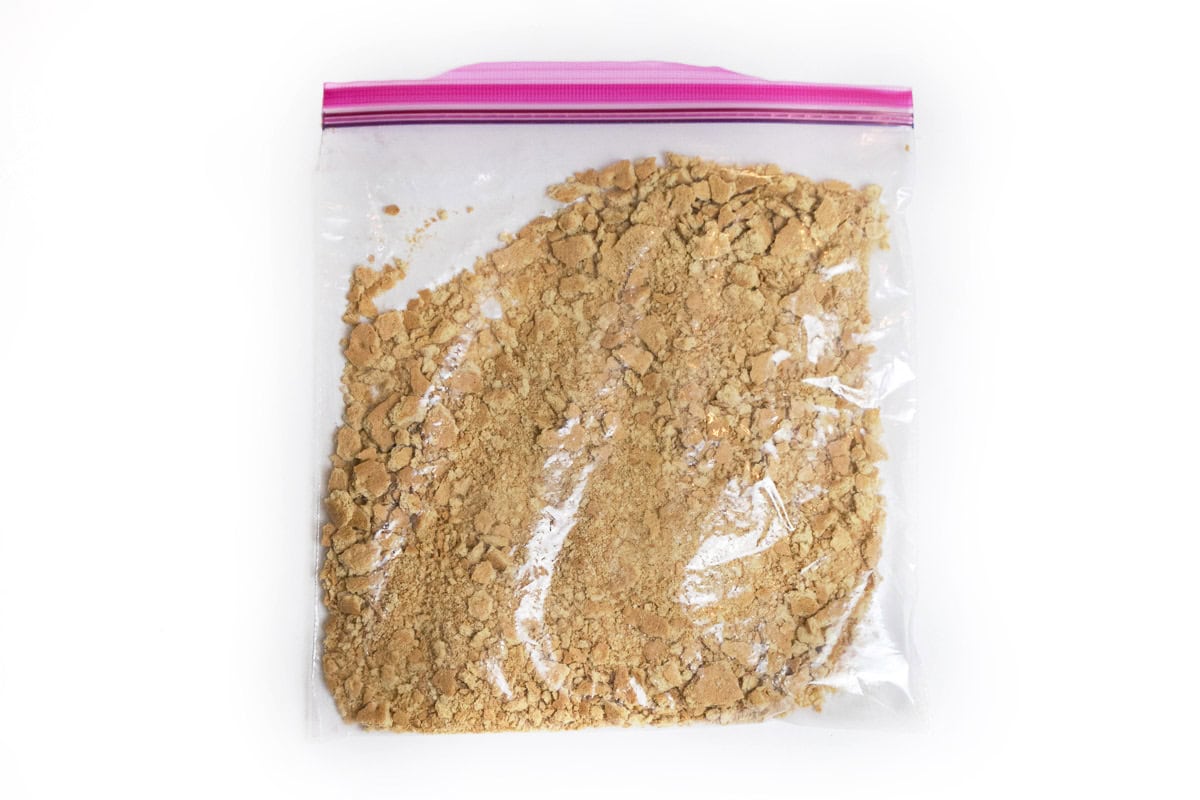
Step 4. Crush the Graham Crackers
Place about 1 and 1/2 sleeves of graham crackers in a bag. Crush the graham crackers in the bag by using the palms of your hand, or you can also use a rolling pin over the bag to crush them. You should end up with about 2 cups of crushed graham crackers.
Tip: When you buy a box of graham crackers, the box contains 3 sleeves in it. There are 9 cracker sheets in each sleeve. so that’s 13 and 1/2 sheets we used.
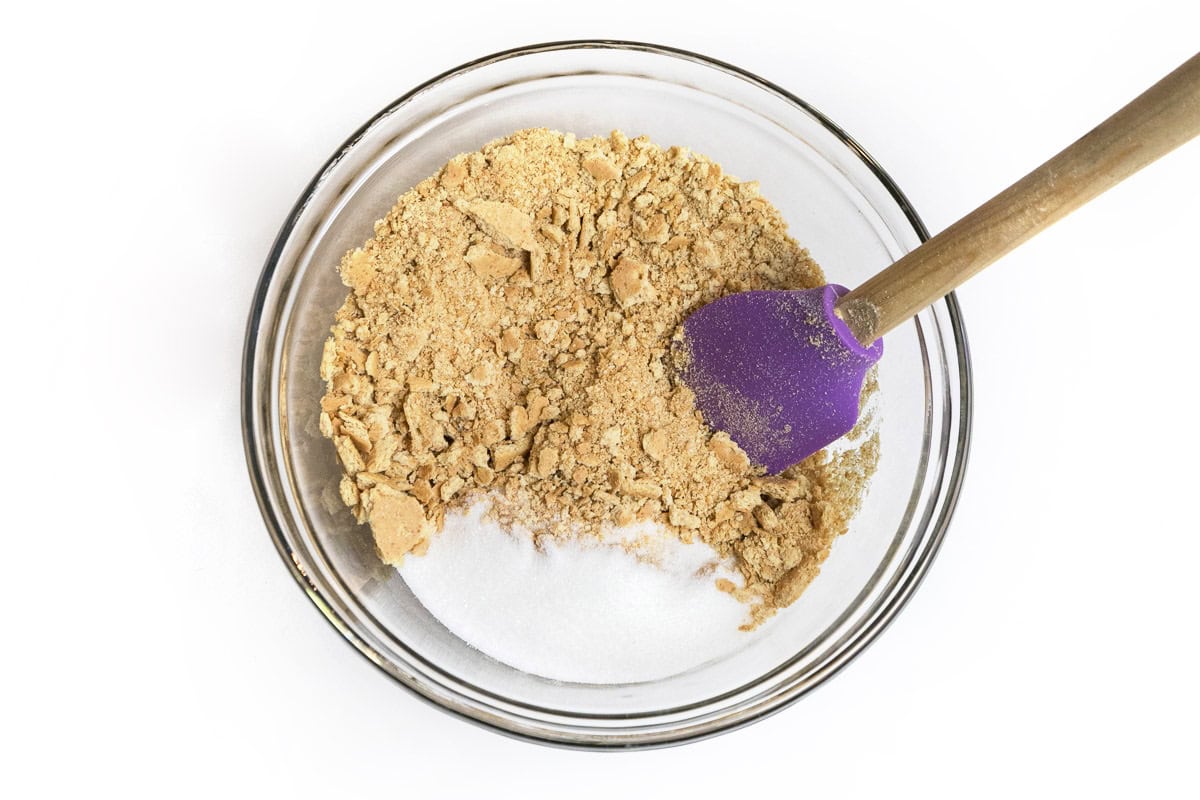
Step 5. Prepare the Crumb Mixture
In a large bowl, add the crushed graham crackers, and 1/4 of a cup of sugar (save the other cup for the cream cheese), and the melted butter we set aside earlier.
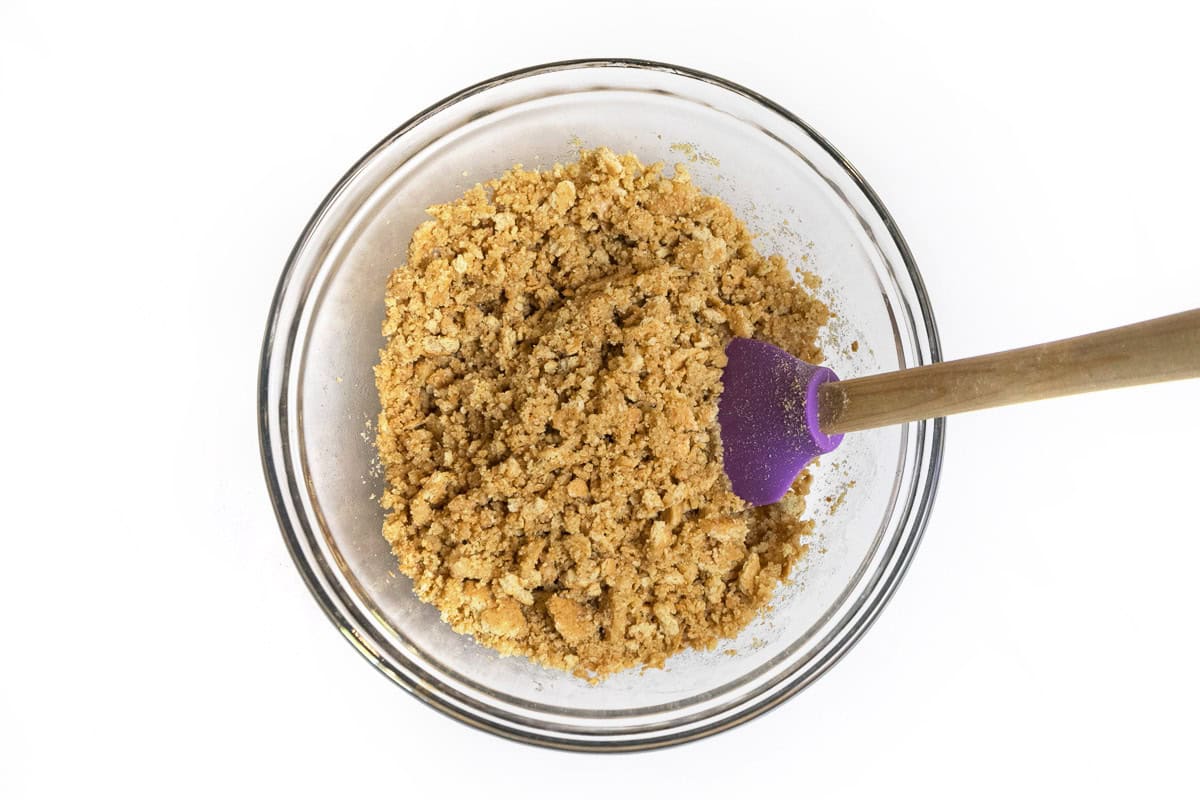
Step 6. Combine the Crumb Mixture
Mix the crushed graham crackers, sugar, and the butter we melted earlier, until thoroughly combined.
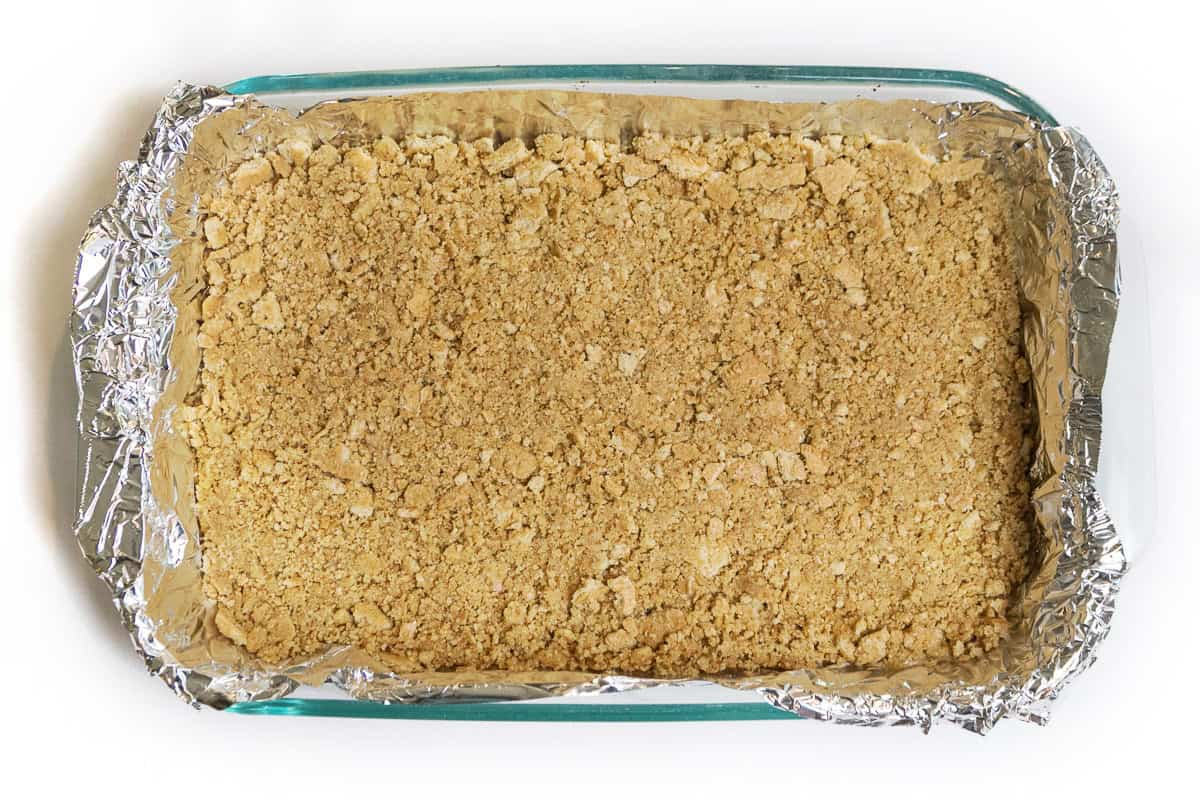
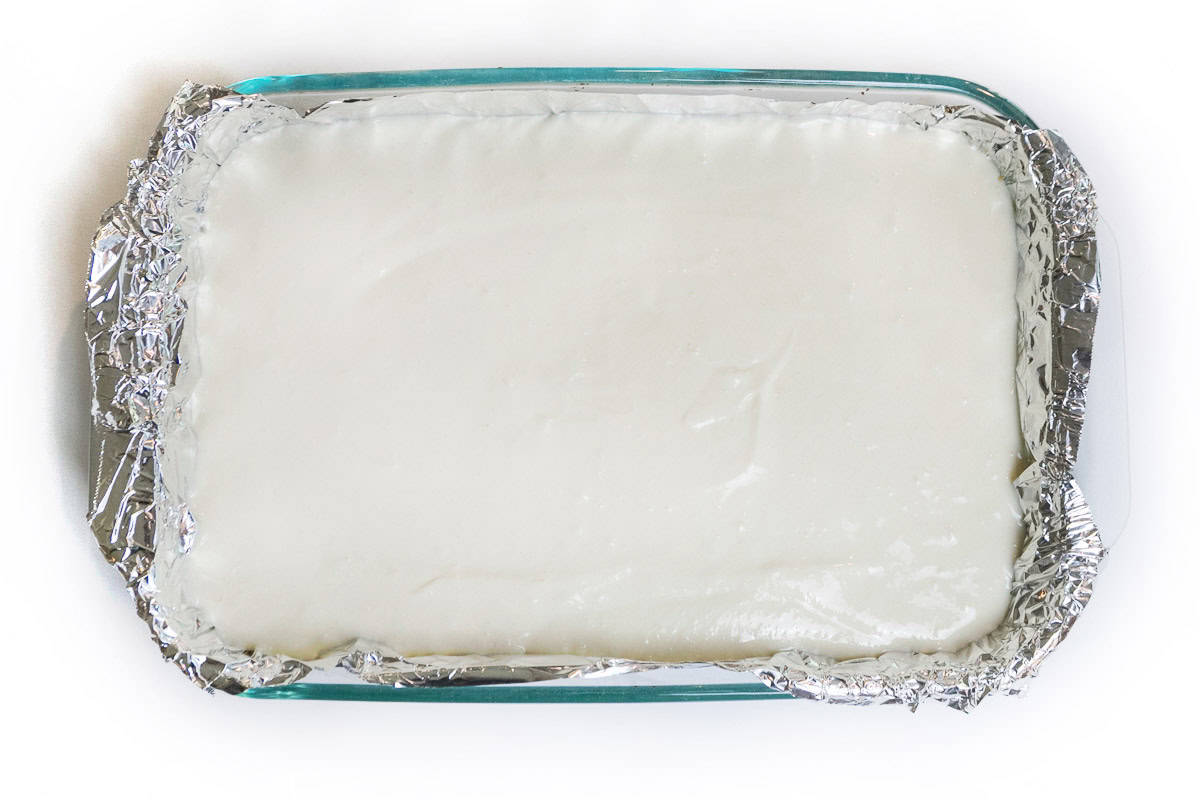
Step 7. Put the Crumb Mixture into the Baking Dish
Scoop out the crumb mixture from the bowl and put it into the prepared baking dish. Using your hands or a spatula, press crust mixture evenly in the baking dish. This crumb mixture will be the base, also known as the crust, for the cream cheesecake bars. Set the baking dish with the crust mixture in it aside for now.
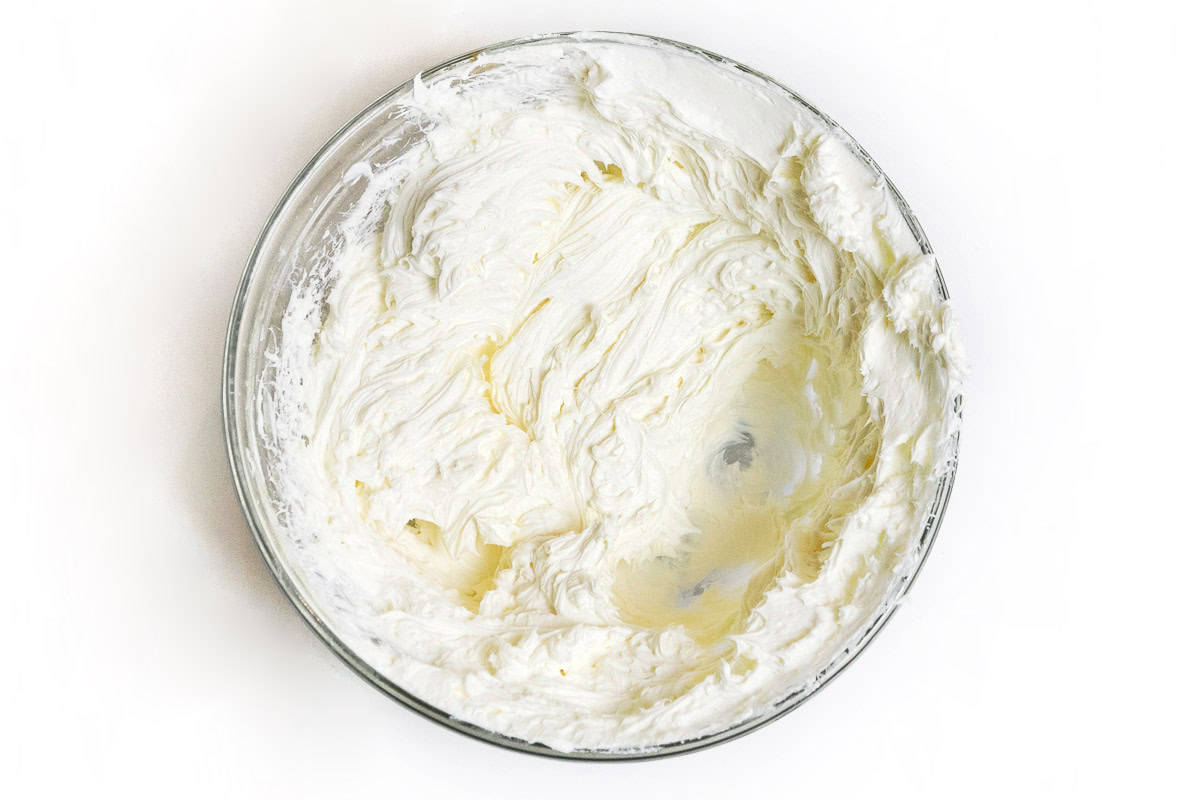
Step 8. Beat the Cream Cheese
Remove the wrapping from the softened cream cheese we put on the countertop earlier, then put the cream cheese into a large mixing bowl. With a hand held electric mixer, whip the cream cheese for about two minutes on high speed until stiff peaks form.
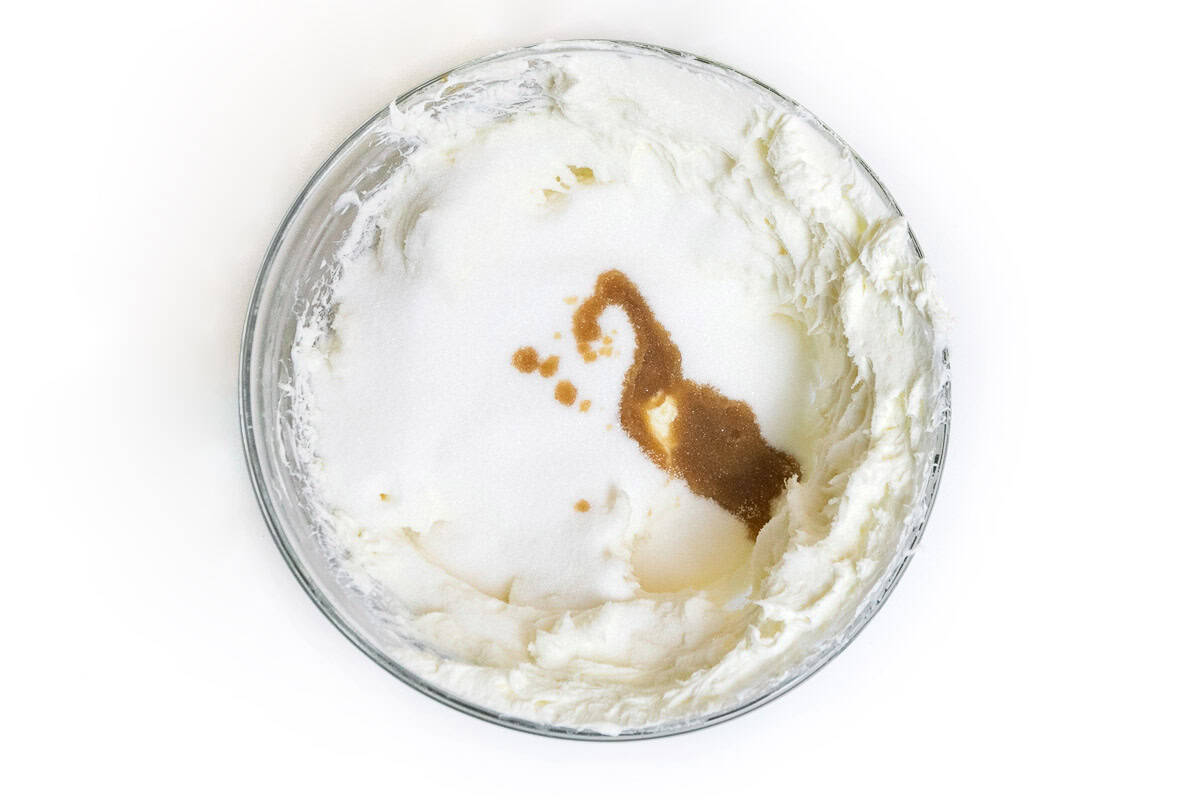
Step 9. Add Sugar, Vanilla Extract, and Salt
Add the remaining 1 cup of sugar, 2 teaspoons of vanilla extract, and 1 teaspoon of table salt together with the whipped cream cheese.
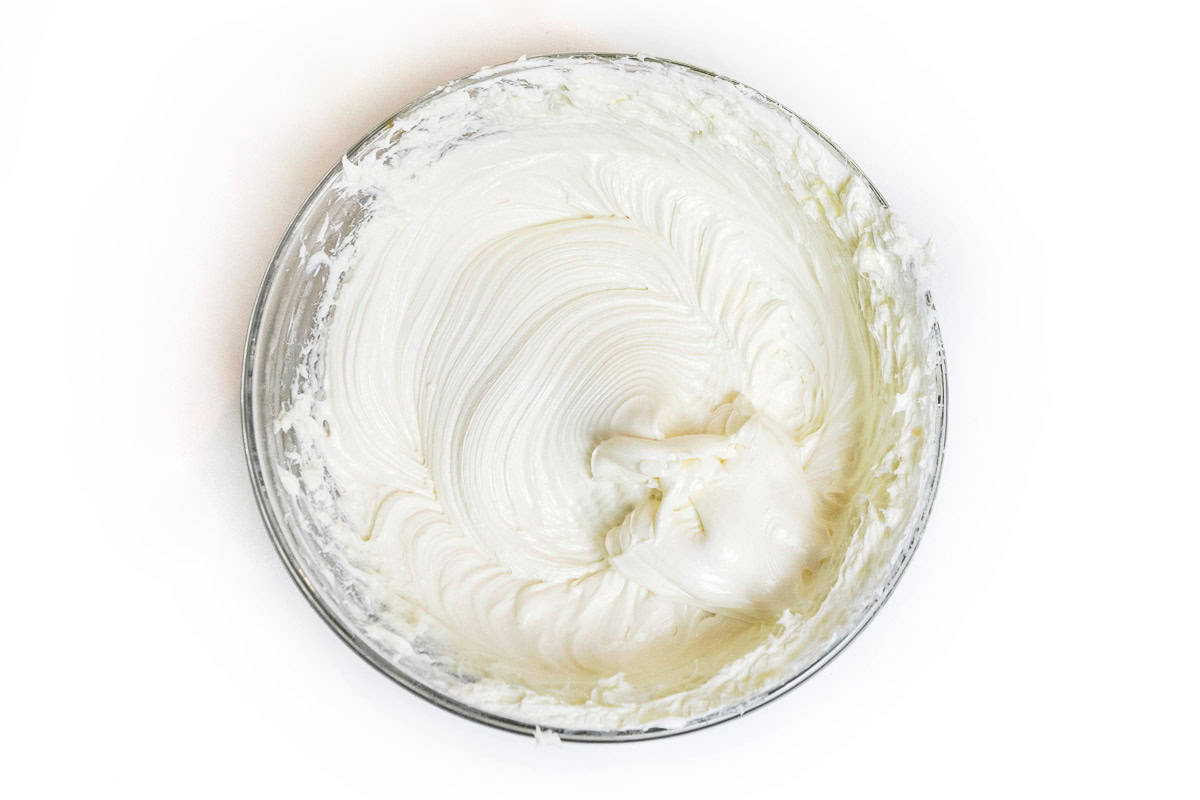
Step 10. Beat Cream Cheese Mixture Again
For an additional two minutes, use the hand mixer to beat the cream cheese mixture together with the sugar, vanilla extract, and salt until well combined.
Step 11. Add the Eggs
Using the hand mixer, put one egg in the cream cheese mixture at a time and beat on medium speed until well blended.
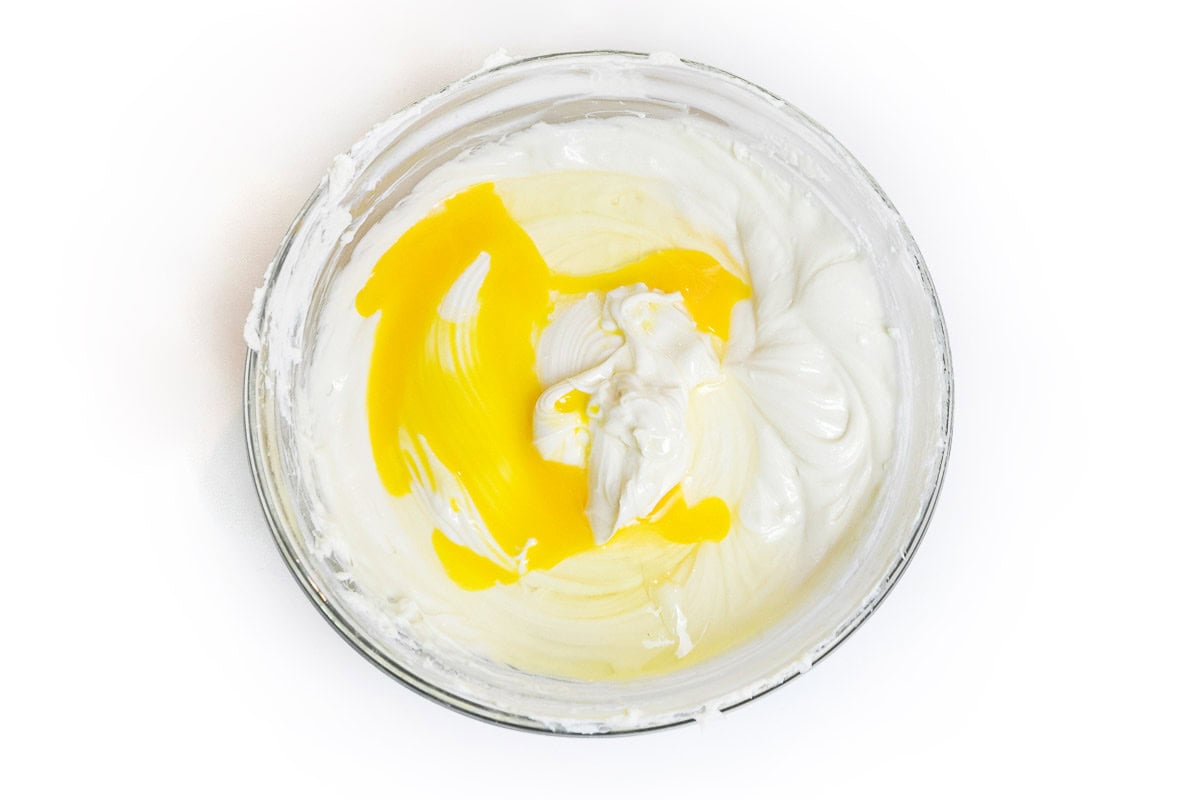
Step 12. Mix Cream Cheese Mixture Well
Thoroughly blend the eggs together with the cream cheese mixture. We are now finished preparing the cheesecake filling.
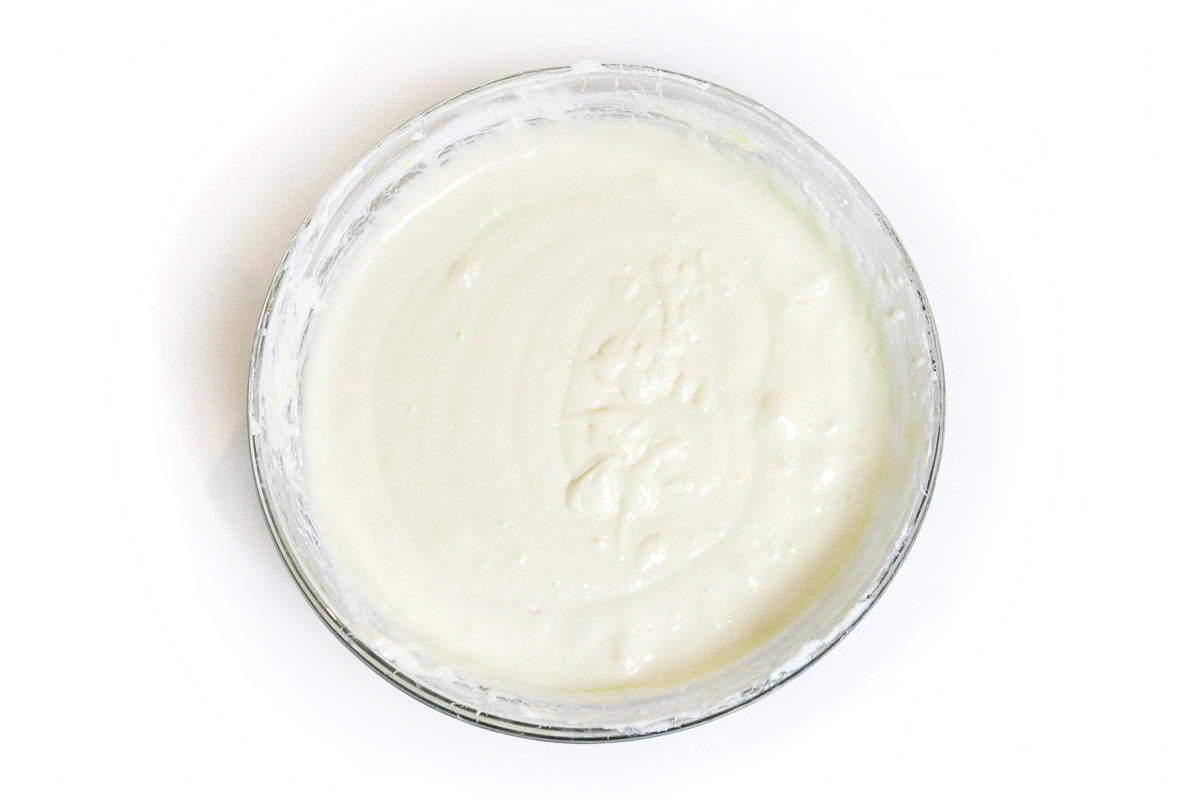
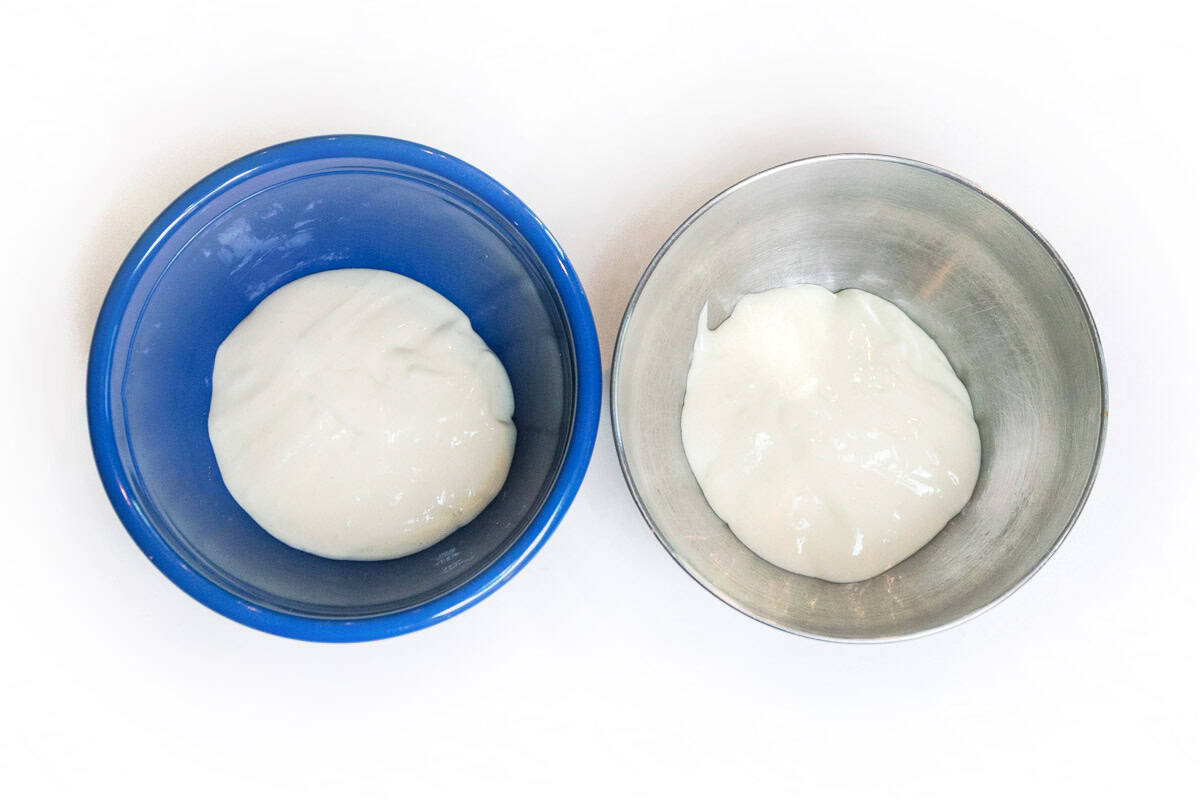
Step 13. Prepare the Red and Blue Cheesecake Filling
Using two separate bowls, put 1/4 of a cup of the cheesecake filling that we just prepared, into each bowl.
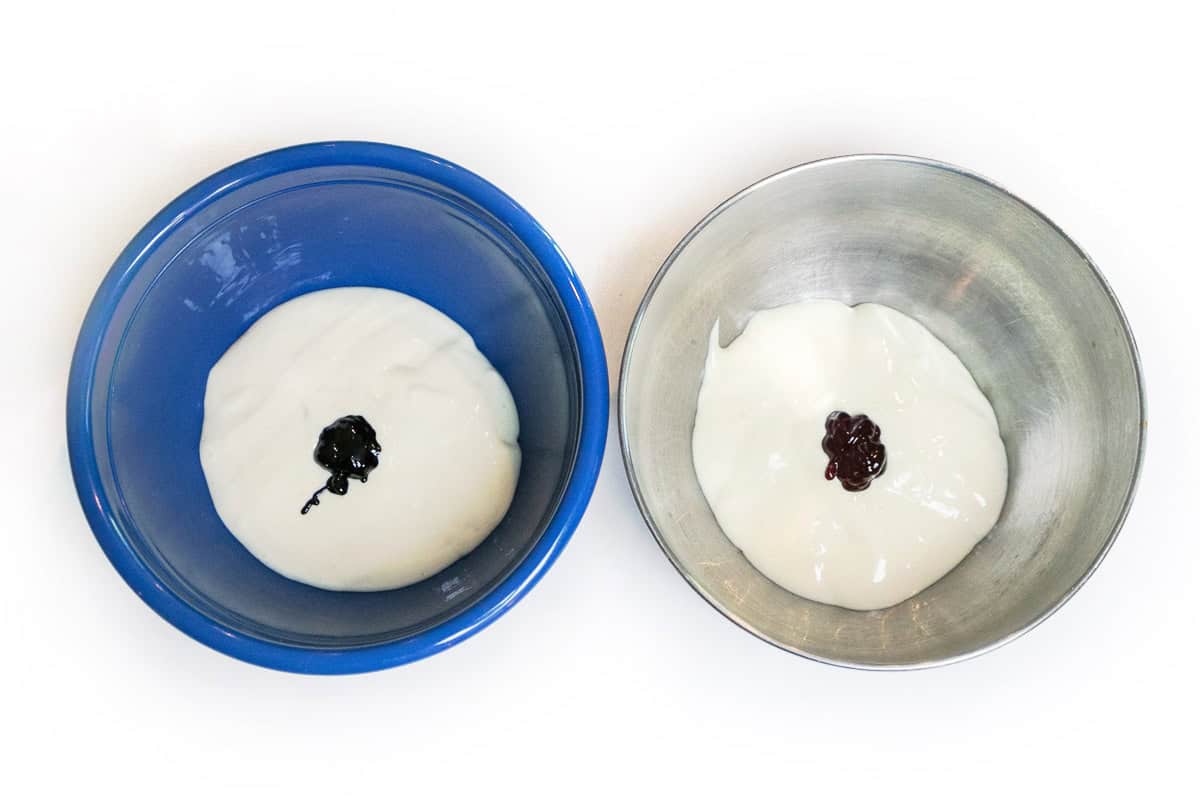
Step 14. Put in the Food Coloring
Add the blue food coloring to one bowl with the cheesecake filling in it, and then add the red food coloring to the other bowl with the cheesecake filling in it.
Step 15. Stir in the Food Coloring
Combine the blue food coloring and the red food coloring together with the cheesecake filling in each bowl until well blended.

Step 16. Fill the Baking Dish with Cheesecake Filling
Pour the remaining non-colored cheesecake filling on top of the graham cracker crust that is in the baking dish.
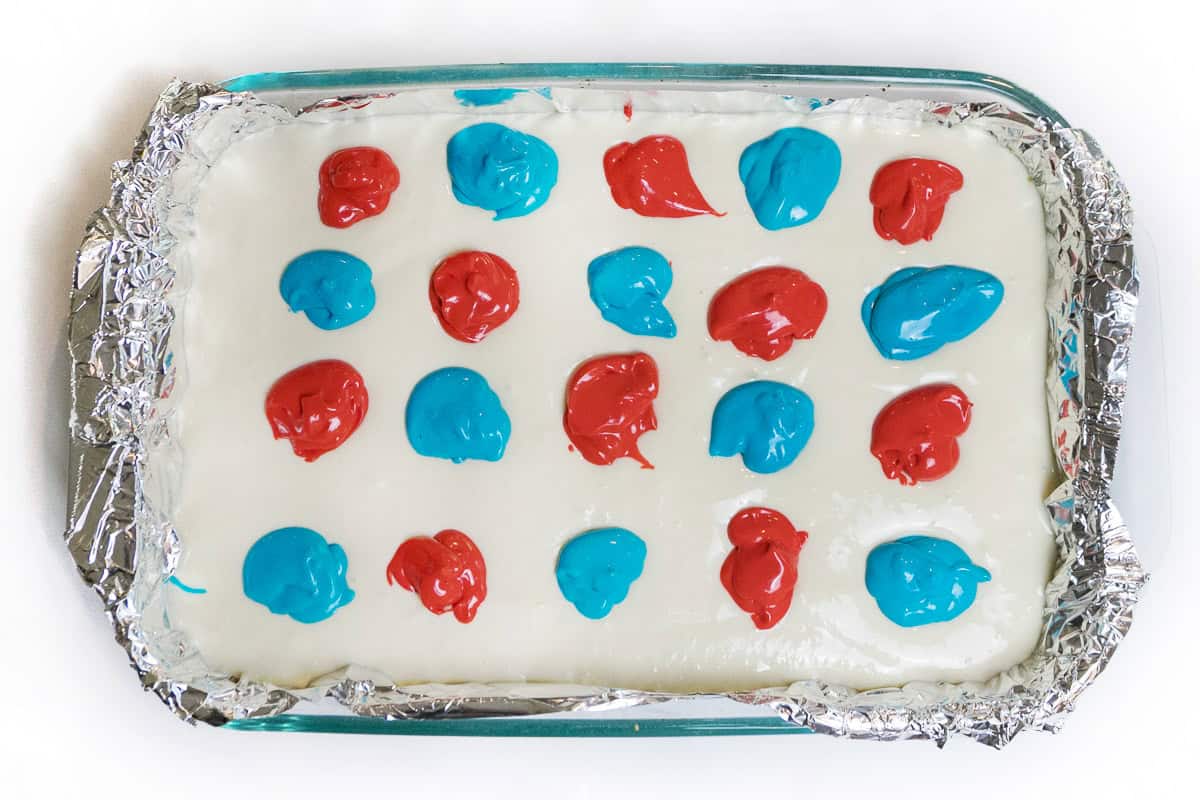
Step 17. Apply the Colored Cheesecake Filling
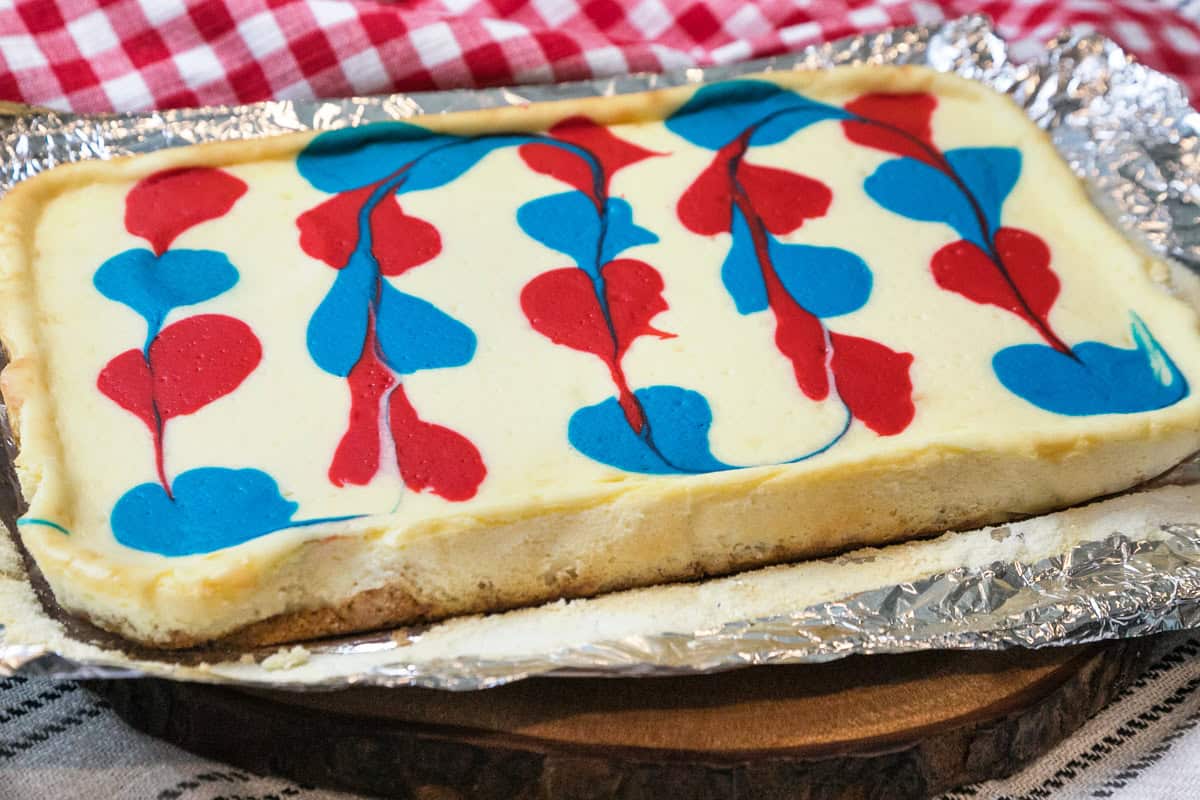
Drop, by spoonful, the colored red and blue cheesecake filling on top of the cheesecake layer we just put into the baking dish. Alternate the colors in a horizontal line. We were able to put five alternating drops of red and blue colors across the length of the baking dish. Do four rows of this. That comes out to 20 drops.
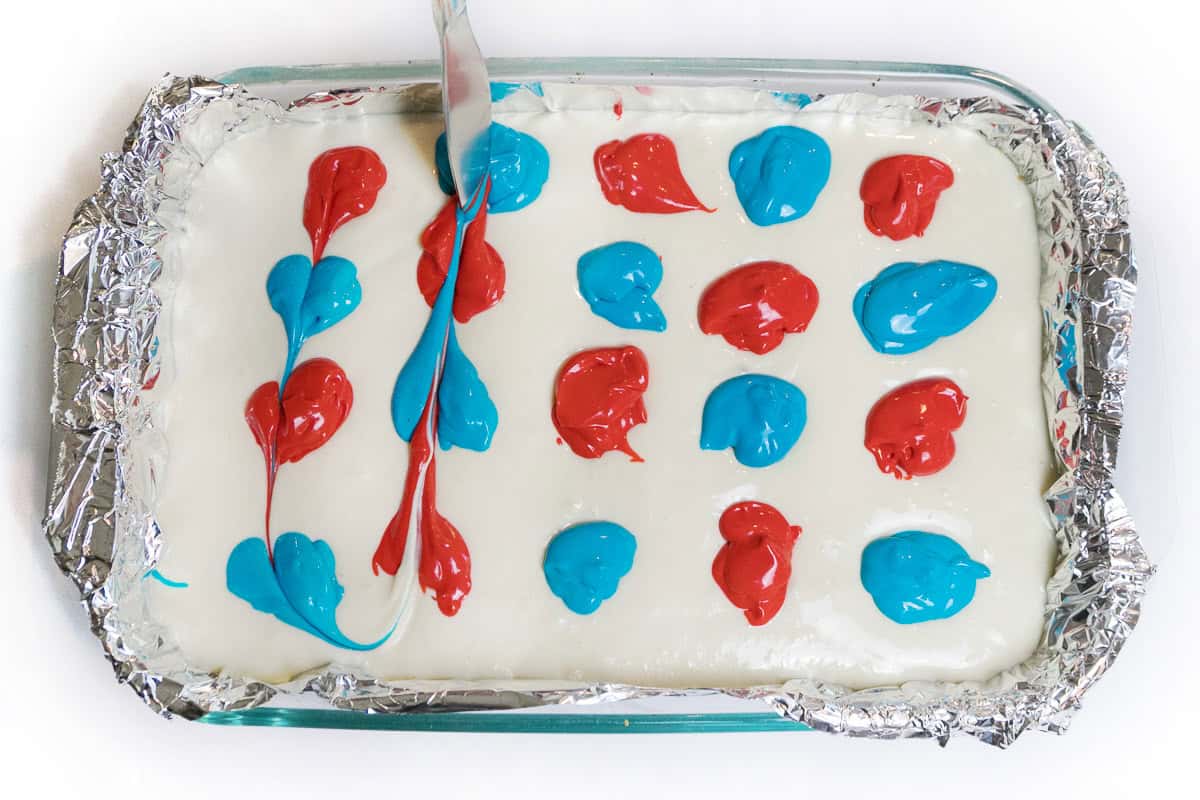
Step 18. Create the Red White Blue Design
Use the edge of a butter knife to create perfect red and blue swirls. To do that, place the baking dish in front of you. With the knife slightly slanted, insert it into the first red color that is in the corner. Drag the knife forward towards you, without lifting it up, through the blue color, and then through the red color, and again through the blue color, and so on, but be careful not to dig the knife into the crust.
As you come to the next row of colors, turn your hand slightly, so the knife can make a clean line as you make a curve to the next row. Keep doing this for all the red and blue colors.
Tip: If you have a hard time turning your hand, just turn the baking dish to continue through each row of colors.
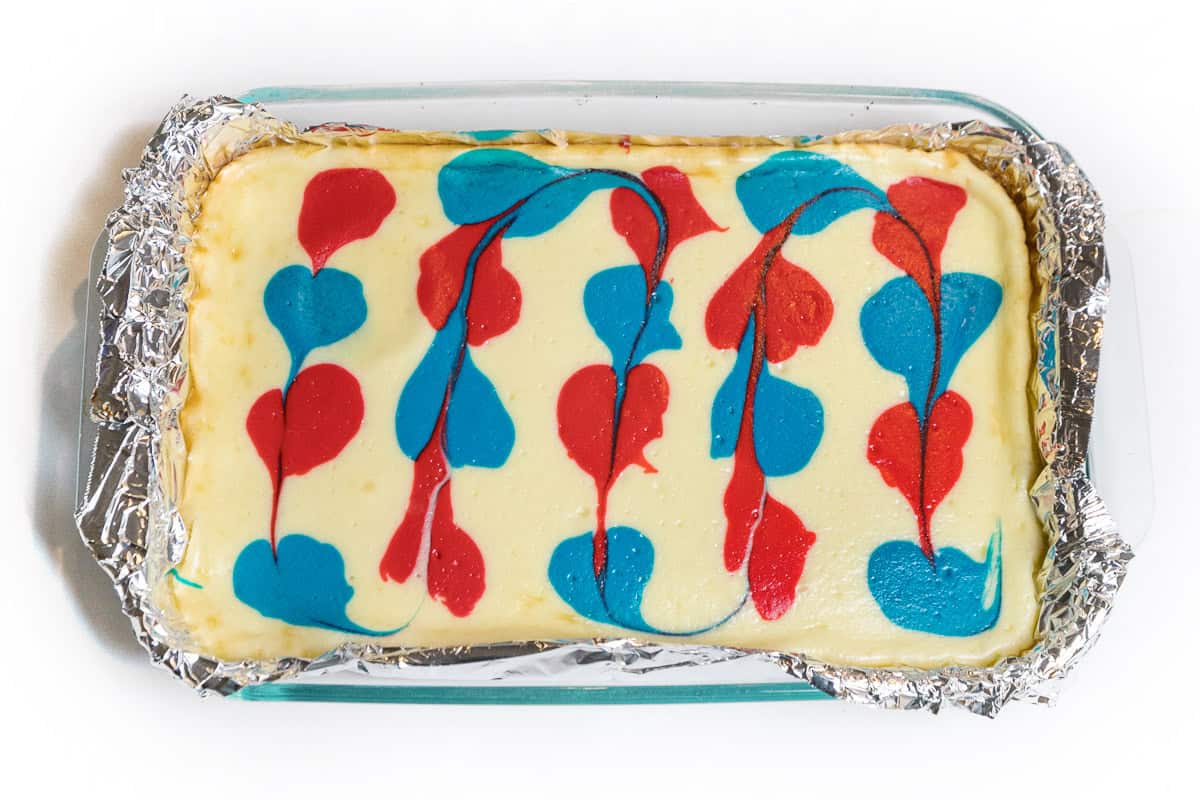
Step 19. Place the 4th of July Cheesecake Bars in the Oven
Using heat-resistant oven mitts, put the prepared cheesecake into the preheated oven at 325 degrees Fahrenheit for 35 to 45 minutes. We did 40 minutes. After that, turn the oven off, and let the cheesecake sit in the oven for one hour before removing.
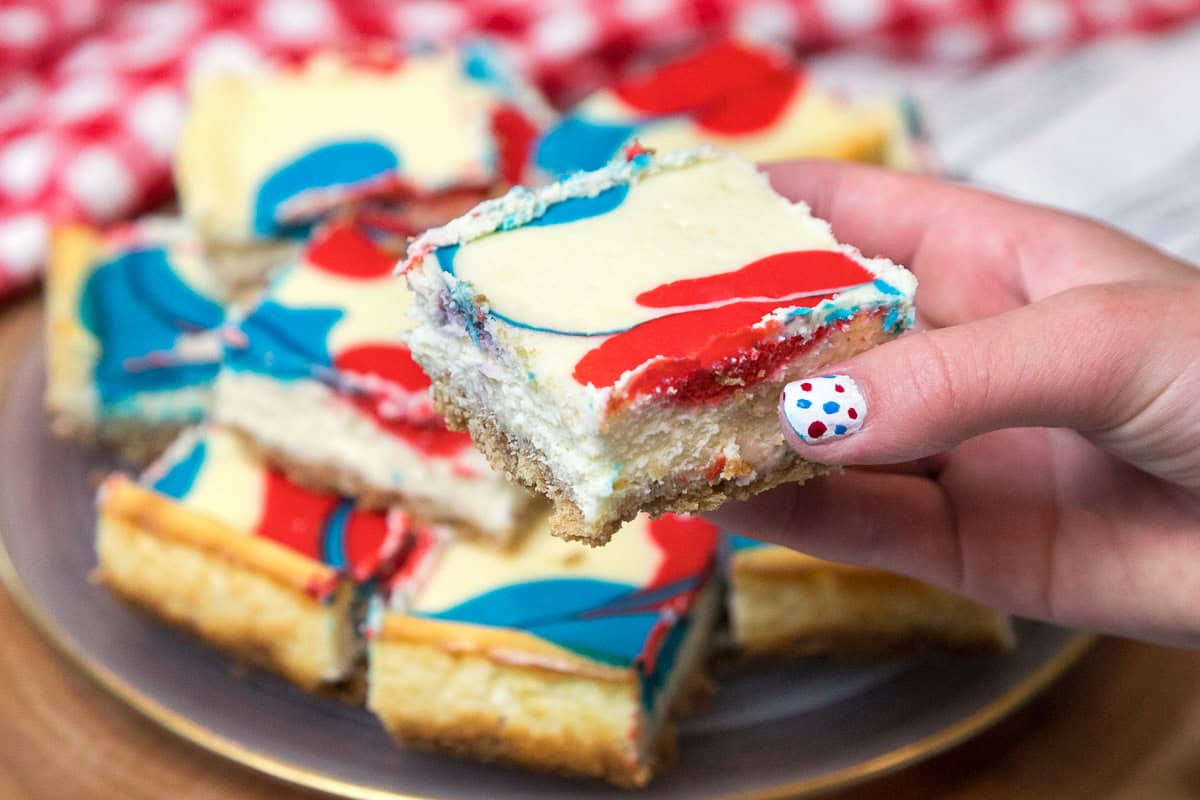
When the hour is up, take the baked cheesecake bars out of the oven using your heat-resistant oven mitts. For the best results, you must put this delicious dessert into the refirgertor overnight to cool down and to firm up. The next day, cut the cheesecake bars into squares to serve.
🌟 Recipe Variations
- Before baking, show off your creative skills by making your own swirls of color with a unique, one of a kind design on top of the cream cheese with the red and blue colored cream cheese filling instead of the design we did.
- Use different colors of food coloring to change the colors for other holiday celebrations.
- Use no food coloring for tasty cheesecake bars any time of the year.
- Another option when not using the food coloring for a festive design, is to put a layer of homemade whipped cream on top of the cheesecake bars.
🙋 FAQs
Cover the baking dish with plastic wrap, or put the cheesecake bars into an airtight container, then put them in the refrigerator.
Yes, 4th of July cheesecake bars freeze very well. Put any leftovers in a freezer safe container. It’s a great idea to make individual servings. Place each cheesecake bar into an individual freezer-safe bag. When you are ready for a cheesecake bar, take one out of the freezer the night before, or even the same day, to thaw. The thawing time isn’t too long.
✏️ Final Thoughts
Are you a cheesecake lover like me? If so, impress your family, friends, and guests by making this perfect patriotic dessert at your next 4th of July party. They are going to love it. It’s super simple to put together, and the taste is absolutely magnificent.
Try making these cheesecake bars for different holidays and occasions. For example, instead of using red and blue food coloring for the swirl design on top of the cheesecake, change the colors to red and pink to celebrate St. Valentine’s Day, or red and green to celebrate Christmas.
📋 Recipe Card
4th of July Cheesecake Bars (Red, White & Blue)
🫕 Equipment
- Baking dish (9×13-inch)
🧂 Ingredients
- 4 pkg cream cheese (8 ounces each – softened)
- 2 cups graham crackers (smashed into crumbs)
- 1¼ cups granulated sugar (1/4 cup for the crust and 1 cup for the cheesecake)
- 4 large eggs
- 1 stick unsalted butter (melted)
- 2 tsp vanilla extract
- 1 tsp table salt
- Red and blue food coloring
👩🍳 Instructions
- Preheat the oven to 325 degrees Fahrenheit.
- Line a 9×13-inch baking dish with aluminum foil. Spray the aluminum foil with non-stick cooking spray.
- Let the cream cheese sit on the countertop to soften.
- Soften the butter for about 20 seconds in the microwave using a microwave-safe bowl.
- Put the graham crackers in a baggie, then crush them with the rolling pin.
- In a large bowl, add the crushed graham crackers, the amount of sugar mentioned for the crust, and the softened butter. Mix thoroughly.
- Pour the graham cracker crumb mixture on top of the aluminum foil in the baking dish. Press the crust down evenly in the dish. Set it aside for now.
- Put the cream cheese In a large bowl. With a hand mixer, beat the cream cheese on high speed for about two minutes.
- Add the vanilla extract, salt, and the remaining sugar to the beaten cream cheese. Mix until well blended to form the cheesecake filling.
- Add the eggs, one at a time, and mix well after each egg is added.
- In two separate bowls, put 1/4 of a cup of the cheesecake filing in each bowl.
- Put blue food coloring in one bowl, and red food coloring in the other bowl. Stir each bowl until completely mixed. Set aside for now.
- Pour the remaining non-colored cheesecake filling on top of the graham crust in the baking dish.
- By spoonful, drop the red and blue colored cheesecake filling in rows on the top layer of cheesecake filling in the baking dish. We ended up with 20 drops.
- In a straight line, use a knife to connect the drops of colored red and blue cheesecake filling.
- Use the heat-resistant oven mitts to place the cheesecake bars in the oven. Bake at 325 degrees Fahrenheit for 40 minutes. Turn the oven off and let the cheesecake bars sit in the oven for one hour.
- Remove the cheesecake bars with the oven mitts, then place them in the refrigerator overnight to chill and set up. To serve, cut into 24 squares the next day.
*️⃣ Recipe Notes
- Don’t skip the required refrigerator time. This chill time firms up the cheesecake bars.
💖 More Dessert Recipes You Will Love
- These delicious no bake Oreo cheesecake bars have a crunchy Oreo crust, a cream cheese filling with crushed Oreo cookies, powdered sugar, and Cool Whip, and then topped with red, white, and blue sprinkles, pieces of Oreo golden cookies and regular Oreo cookies.
- This easy pumpkin cheesecake recipe is made with a graham cracker crust, pumpkin cheesecake filling, then topped with whipped cream and graham cracker crumbs.
- A delightful no bake Oreo cheesecake dessert with a crispy Oreo crust, a creamy cheesecake filling with Oreo crumbs in it, then topped with whipped cream and sprinkled with more crushed Oreo crumbs. So good!
A wife, a mother to a son and a daughter, and a grandmother to three granddaughters. Flo loves sharing recipes passed down from her own mother, her mother-in-law, and her grandmother as well as new recipes created with her daughter, Tamara Ray.
More by Flo ➜